5 MYSTERY GIFTS

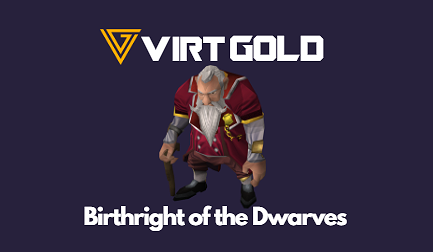
Birthright of the dwarves guide RS3
"Birthright of the Dwarves" is a grandmaster quest and the finale of the Dwarf (Red Axe) quest series. During the quest, King Veldaban decides to take the initiative and strike against The Red Axe rather than wait around for them to attack. This involves uncovering spies and gathering intel from the chaos druids and the Yanille Watchtower before confronting the Red Axe. The climax of the quest culminates in a final battle against Hreidmar and Colonel Grimsson in the chaotic dwarven city of Hreidagrim.
Walkthrough
Start point
Quest map icon Birthright of the Dwarves iconSpeak to King Veldaban on the top floor of Keldagrim Palace
Requirements
Quest Quests:
King of the Dwarves
Forgiveness of a Chaos Dwarf
Forgettable Tale...
The Giant Dwarf
Fishing Contest
Between a Rock...
Dwarf Cannon
Fishing Contest
My Arm's Big Adventure
Eadgar's Ruse
Druidic Ritual
Troll Stronghold
Death Plateau
The Feud
Jungle Potion
Done some work in Tai Bwo Wannai Cleanup
80  Mining
82  Smithing
85  Strength
Only a king
In "Birthright of the Dwarves," you'll find yourself in the majestic Keldagrim Palace, seeking an audience with King Veldaban on the 2nd floor. If he's not present, a simple log out and back in will suffice. Once you meet the king, he'll share the challenges he faces in ruling Keldagrim, both internally with the Consortium and the Dwarven Black Guard, and externally with local trolls and the resurgence of the gods.
As the conversation unfolds, King Veldaban reveals his plan to deal with the main threat: the Red Axe. Despite their recent silence after a failed attack, he's determined not to wait for them to strike again. Instead, he wants to take the initiative and launch a preemptive strike on their base, utilizing the combined might of the Black Guard and his alliance with the local trolls to eradicate them once and for all. The king places his trust in you and requests your help to set his plans into motion.
To assist King Veldaban, there are three crucial tasks you need to undertake:
Firstly, you'll need to investigate suspected Red Axe spies who are currently being held captive by Lieutenant Brae in Keldagrim West's record chambers. Your mission is to ascertain their true intentions.
Secondly, you must venture to Taverley Dungeon and confront the chaos dwarves lurking there. King Veldaban suspects that the Red Axe may be plotting something within the depths of the dungeon.
Lastly, he entrusts you with the important mission of seeking aid from the Watchtower Wizard in Yanille. The goal is to find a way to counter the ogre shaman's memory-altering magic, drawing upon their expertise in defending against the ogre shamans of Gu'Tanoth.
To mark you as his official agent during these tasks, King Veldaban bestows upon you a royal dwarven seal. You don't need to report back to him after completing each individual task, making it more efficient to talk to him once you've finished all three.
Now, the fate of Keldagrim and the dwarven realm rests upon your shoulders. As King Veldaban's trusted ally, it's up to you to confront these challenges head-on and ensure the downfall of the Red Axe, securing a brighter future for all dwarves. May your journey be filled with courage and determination!

Investigating the spies
In the depths of the records chamber cave, located to the west of the bank along the western wall, you encounter Lieutenant Brae overseeing four prisoners: Brendt, Klaas, Vigr, and Grundt. As you approach, Brae expresses her concern about holding them without formal charges and wonders when King Veldaban will arrive. You calmly inform her that the king has entrusted you with this task and present the royal dwarven seal as proof of your authority.
Curious about the suspects, you inquire with Brae about their identities and involvement with the Red Axe. She hesitates for a moment before divulging the information she has gathered on each individual. You listen carefully, absorbing the details she provides about their backgrounds and potential connections to the notorious faction.
Armed with this knowledge, you begin your investigation, determined to discern the truth about these individuals' allegiance. King Veldaban's strict instructions echo in your mind – if any of them are found to be working with the Red Axe, the penalty is death. For those who have committed treason but cannot be directly linked to the Red Axe, their punishment is exile, banished as far from Keldagrim as possible.
As you delve deeper into the complex web of intrigue, you must exercise both caution and discernment, for the fate of these prisoners and the safety of Keldagrim hang in the balance. The responsibility is great, but you remain resolute, knowing that your actions will have a significant impact on the course of events in the realm of dwarves.
Vigr

Approaching Vigr's workshop, you find it adorned with Orange Flame banners and currently occupied by Sieglinde, who allows you to search the place without objection. As you meticulously examine the workshop, your keen eyes spot a bundle of hidden letters tucked away beneath the furnace. Upon inspection, you realize they are incriminating correspondences between Vigr and a Red Axe spymaster, which abruptly ceased around the time of King Veldaban's ascension to the throne.
Armed with this undeniable evidence, you confront Vigr, the tradesman selling warhammers. His initial reluctance to cooperate disappears as you present him with the damning letters. Vigr confesses to once being a spy for the Red Axe, but he fervently maintains that he severed all ties with them after Veldaban became king. He insists that he is no longer a threat to the kingdom and promises that if he were ever contacted again, he would adamantly refuse to spy for the Red Axe.
Brae, seeking resolution, asks for your judgment in this critical moment. Vigr, on his knees, pleads for mercy, begging you to consider exiling him instead of carrying out the harsh penalty of death. The weight of the decision rests upon your shoulders.
With conflicting emotions and the well-being of Keldagrim in mind, you must decide Vigr's fate. As a loyal agent of King Veldaban, you have the authority to make this significant choice, balancing justice and compassion. Whatever your decision, the consequences will ripple through the kingdom, shaping the destiny of not only Vigr but also the future of Keldagrim itself.
Klaas

Upon investigating further, you discover that Klaas, a member of the Keldagrim Monarchist Society, has been actively calling for the overthrow of King Veldaban, claiming that he is not the rightful king. His actions are considered treasonous, but there's a possibility that the Red Axe might have instigated these sentiments. Klaas adamantly denies any involvement with the Red Axe and asserts that his cause is rooted in his belief that Veldaban is an illegitimate ruler.
According to Klaas, the Monarchists share his views and consider Veldaban a usurper due to his failure to dissolve the Consortium and his reliance on advisors. He argues that there has been no substantial change since Veldaban took the throne, making the case for the people to depose him in favor of the true king. Despite his fervent beliefs, he maintains that aligning with the Red Axe would be even worse, and he insists that Meike, a key figure in the King's Axe Inn, knows he would never collaborate with the malevolent faction.
To dig deeper into Klaas's intentions, you head to the King's Axe Inn, engaging in a thorough conversation with Meike. She confirms that Klaas indeed discussed the notion of a revolution with her, but she doesn't believe he would collaborate with the Red Axe. Her knowledge of Klaas's character paints a different picture from the one of a potential traitor.
Returning to the records chamber, you confront Klaas once more, relaying Meike's testimony on his behalf. However, Klaas remains unyielding, expressing his refusal to recognize King Veldaban's authority. As Brae urges you to pass judgment, you face a weighty decision.
In this critical moment, you hold the power to determine Klaas's fate. You can choose to release him, mete out the penalty of execution, or decide on exile as his punishment. Consider the implications of your choice carefully, for the decision will have far-reaching consequences not only for Klaas but also for the stability and harmony of Keldagrim. The future of the kingdom rests in your hands.
Brendt and Grundt

As you delve deeper into the case, it becomes apparent that both Brendt and Grundt, seemingly innocent traders, are embroiled in the intrigue. They were arrested on Jatizso after mentioning the Red Axe while picking up an ore shipment from King Sorvott, raising suspicions about their true intentions on the island.

When questioned about King Sorvott's claim, Brendt explains that the king misunderstood the situation. The mention of the Red Axe was in reference to their ship captain, Redaxe, known for his distinctive red, axe-shaped beard. Grundt contradicts this, stating that the ship's captain was, in fact, named Sigridsdottir, a female name, and he's uncertain if she had any nickname. His explanation about the "red axe" is stammered and incoherent.
To dig deeper into the truth, you inquire about the weapon Grundt carried on Jatizso from Brendt. Brendt is unsure and believes Grundt did not take his weapon out of the cabin during the trip. When you confront Brendt about Grundt's belief that the captain was called Sigridsdottir, Brendt vehemently insists that Grundt is mistaken and that the captain's name was Redaxe.
As the pieces of the puzzle come together, it becomes evident that both Brendt and Grundt are spies, entangled in a web of lies and deceit. Brendt shows no remorse for his actions, unapologetically admitting to being a spy. In contrast, Grundt, when faced with the threat of execution, pleads for his life, vowing to never work for the Red Axe again.
The weight of judgment now falls upon you. You must decide the fate of Brendt and Grundt, considering their roles as spies and the potential threat they pose to Keldagrim's safety. Each choice carries significant consequences for the future of the kingdom, and the lives of these two individuals hang in the balance.
Once you have made your decisions regarding all four suspects, your task here comes to an end. The fate of Keldagrim, now altered by your choices, awaits the unfolding of the future.
Taverley chaos dwarves
Veldaban's concern for the safety of both human and dwarven lands intensifies, as he suspects that any chaos dwarves found in the world might be linked to the Red Axe's dangerous operations. To ensure the rogue corporation's influence is not spreading perilously close, you're entrusted with a mission to venture into Taverley Dungeon. Your task is to keep a vigilant eye out for anything suspicious while taking care of the chaos dwarves dwelling within.
Upon entering Taverley Dungeon, you make your way to the southern end, where the chaos dwarves dwell. If you possess the agility to use the pipe shortcut (70 Agility, boostable), it significantly expedites your journey to the dwarves' location. There, amidst the chaos, you engage in combat, eliminating the chaos dwarves one by one.
As you press on, a mysterious figure named Ikadia the Exile emerges from the shadows, recognizing your search for information. She reveals that she holds the key to the knowledge you seek. However, before divulging the crucial information, she challenges you to a duel.
Ikadia, a formidable level 126 mage with 10,000 life points, stands before you, ready to face you in combat. She skillfully wields abilities, showcasing her prowess in battle. Although her weakness is arrows, she proves to be a formidable adversary. Yet, with your determination and adaptability, you succeed in defeating her, claiming victory.
Once vanquished, Ikadia acknowledges your strength and willingly offers the information you seek. In an unexpected turn, she even asks you to end her life. You, however, have the option to choose compassion over violence and spare her instead.
Your journey into Taverley Dungeon unveils not only vital information about the chaos dwarves but also a moral dilemma. As you continue your mission to safeguard Keldagrim from the Red Axe's nefarious influence, the choices you make will shape the destiny of the realm and the lives you encounter along the way


Yanille's Watchtower Wizard
Veldaban's request weighs heavily on your mind as you make your way to the Watchtower, where the wizard resides on the top floor. You recall the potion you once used to defeat the ogre shamans under Gu'Tanoth, hoping that a similar solution could aid in countering the memory-wiping shaman aligned with the Red Axe.
Upon reaching the wizard, you divulge the urgent need to confront another ogre shaman, but this one possesses the perilous ability to erase memories. The wizard is visibly startled, realizing that a conventional magic ogre potion won't suffice in this situation. Instead, a specialized solution must be devised to counteract the memory-wiping effect. In response to the gravity of the task, the wizard entrusts you with a memory wand that requires calibration before it can be effectively employed against the cunning shaman, Grunsh.
Understanding the importance of this endeavor, you ensure that no followers accompany you during the calibration process. Armed with the memory wand, you set out to interact with all the peculiar items in the vicinity, including beers and kebabs. Each interaction releases four fragments that swiftly dart around the area. Swiftly, you endeavor to catch each fragment and meticulously investigate each red memory void they lead you to.
To calibrate the memory wand accurately, you must discern the appropriate fragment for each item. If you succeed, the fragments will merge with the item, aligning the wand with its memory-wiping properties. However, should you make an error, you'll need to recollect the fragments and try again.
The weight of this task lies upon your shoulders as you navigate the intricate process of calibrating the memory wand. The fate of Keldagrim and the impending confrontation with the Red Axe's memory-wiping shaman rests in your hands. With determination and precision, you strive to unlock the potent solution that will safeguard the memories of those you hold dear and thwart the sinister plans of the Red Axe once and for all.

The assault on the Red Axe
Once you have finished all of the King's tasks, return to Veldaban and after updating him tell him you will meet him in the Barendir tunnels.
To reach the tunnels, talk to the Dwarven Boatman situated on the eastern side of the river, just north of the palace, to travel to the area located South of Dondakan's rock and proceed to run east to the Barendir tunnels. Enter the tunnels and run north east past the sparkly crystals and enter the cave at the end. Talk to King Veldaban, at the far north of the cave, and he will instruct you to talk to Nulodion next to him. Nulodion will give you explosive gears to sabotage the cannons during the assault. Fire the cannon that is pointed at the wall, and there will be a cut-scene showing the battle against the chaos dwarves.
If you need to grab any food or potions, the Black Guard quartermaster will allow you to access your bank.
You cannot bring a familiar to the lava flow mine, as the game will prevent you from doing so. If you die, simply re-enter the way you came in. Your gravestone will be a short distance away in the tunnels.

As you step into the treacherous battleground, you immediately activate the Protect from Missiles prayer to shield yourself from the relentless barrage of cannon fire that could deal massive damage, approximately 4000 points.
To reach the first two cannons on the middle section, you dash towards the western part of the arena, seeking refuge behind a sturdy pillar. The cannons relentlessly target the pillar, taking two hits to knock it down. As soon as it collapses, you seize the opportunity to cross over and disable the first two cannons. When the cannons explode, they release an explosion dealing around 500 damage to those standing nearby, but it's a minor concern compared to the imminent danger posed by fully-operational cannons. You might face other enemies during this phase, but they pose little threat to you. You consider dealing with some of them to build up adrenaline for defensive abilities like Devotion, Reflect, or Resonance, providing added protection if the damage becomes overwhelming.
With the first two cannons dismantled, you advance further to the east side of the middle platform, taking cover behind another pillar. Once it's knocked down, you swiftly cross to the far side and disable the last three cannons, neutralizing their deadly threat.
Your efforts lead you to a confrontation with Grimsson, but he proves to be a cunning adversary. In a desperate escape attempt, Grimsson flees using a minecart. Undeterred, Veldaban gives chase, leaving you to deal with the aftermath of the battle.
If you happen to meet an unfortunate demise during the intense combat, your gravestone will appear somewhere within the Barendir tunnel. Any cannons you've previously destroyed will be inexplicably repaired. Upon your return, be sure to have sufficient space to receive the Explosive gear required to eliminate the cannons once more.
As you successfully demolish the cannons, your path leads you west and up a platform where Grimsson awaits. Without hesitation, he bolts away in a minecart. In a strategic move, Veldaban activates the bridges to pursue the escaping foe. You promptly leap into the remaining minecart, embarking on a high-stakes pursuit to bring Grimsson to justice.
Throughout this perilous journey, you have demonstrated courage and skill, and the fate of Keldagrim hangs in the balance. With the chase intensifying, every decision you make could sway the tide of this fierce confrontation. Remain vigilant and determined as you press forward, seeking to put an end to the Red Axe's sinister plot and secure a brighter future for all of Keldagrim
Repairing memories
As you board the minecart and confront Hreidmar and Grimsson, a crucial battle for the fate of Keldagrim unfolds before you. However, a dangerous encounter awaits you as the cunning ogre attempts to cast a spell on you. To avoid being teleported outside, you ensure you have your trusty wand at the ready, thwarting the ogre's attempt.
In the midst of the confrontation, the ogre seeks to plant false memories into Veldaban's mind, aiming to deceive and manipulate him. Fortunately, the memory wand proves to be a potent tool in stopping the deception, safeguarding Veldaban from the insidious influence.
Unexpectedly, a mysterious force pulls you, Veldaban, Grimsson, Hreidmar, and the ogre into a realm of false memories. Within this surreal realm, Veldaban's "memory" depicts a vivid battle against trolls, fighting alongside a Zamorakian army of dwarves in the epic Battle of Barendir. Grimsson's "memory" intertwines, recounting the same battle where he proudly slaughters hordes of trolls. Meanwhile, Hreidmar's "memory" unveils a startling revelation, as he believes himself to be the rightful heir, receiving a divine message from none other than Zamorak himself, urging him to claim the throne.
As you traverse these fabricated memories, the lines between truth and deception blur, presenting a formidable challenge. In this enigmatic realm, you must discern reality from illusion, unraveling the complex web of deceit woven by the Red Axe. The destiny of Keldagrim hangs in the balance, and your choices will steer the course of this enigmatic confrontation.
With the memory wand serving as your beacon of truth, you strive to uncover the real motives and intentions of Hreidmar, Grimsson, and the Red Axe faction. As you navigate through these illusory memories, be steadfast and unwavering, for the revelations you unveil within this surreal realm will undoubtedly shape the outcome of the ultimate battle between good and evil. The future of Keldagrim and its people relies on your courage and wisdom, as you face the final moments of this grand quest, "Birthright of the Dwarves."

Veldaban's memory
The wand must be used on the royal Red Axe standard, the Zamorakian Chaplain, and the dwarf standing next to him, and the memories must be corrected like earlier in the quest. There are three of each type.

Grimsson's memory
After that, you will arrive in Grimsson's memory. There are six troll fragments and six dwarf fragments. Use the wand on the two trolls directly next to Grimsson. Dwarf Bone is the name of the large troll to the right of the Small troll, not an actual dwarf bone.

Hreidmar's memory
Next, you will arrive in Hreidmar's memory, where he is talking to Zamorak, who is revealed to only be a statue. There are six fragments. Use the wand on Zamorak.

Grunsh's memory
As you enter the final stage of this epic quest, a critical task lies ahead - fixing the ogre's corrupted memory. Armed with the memory wand, your mission is to gather the memory fragments from each of the three dwarves present in the room. However, you face a formidable challenge with Grunsh, who adamantly refuses to see his memories. Determined to set things right, you must use the wand forcefully on him.
As you apply the memory wand, Grunsh reacts defensively, casting a spell that transforms a "pure" memory into a hazardous form. An encounter with any dangerous memories poses a severe risk, as it would release all the previously gathered memories, setting you back in your progress. The dangerous memories hold the potential to revert to their standard form after a brief period, but you must exercise utmost caution and avoid collecting them at all costs.
With great care, you diligently gather all the "pure" memories from the dwarves, ensuring that you do not fall prey to the dangerous ones. As you complete this critical task, you're left with three memories of each type - safe and untainted.
The next step demands that you apply these "pure" memories to the memory voids, akin to your earlier experiences in this quest. With the memory wand guiding you, you approach each void with determination, infusing them with the uncorrupted memories.
Your unwavering resolve and astute judgment bring you closer to restoring the ogre's memory to its true form. With every memory fragment secured and placed in its rightful place, the tangled web of deception begins to unravel. The fate of Keldagrim and the future of its inhabitants hinge on this crucial moment.
As you progress, remember the gravity of your choices and their profound impact on the outcome of this quest. Stay vigilant and true, as you stand at the precipice of triumph and defeat. Through your unwavering determination, may the mysteries be unraveled, and the darkness be dispelled, bringing hope and salvation to Keldagrim and its people. The epic conclusion to the "Birthright of the Dwarves" awaits, and your heroic journey draws to its ultimate climax.

Veldaban of the Red Axe
As you step through the doorway behind Veldaban, an eerie sight greets you - an empty version of the Keldagrim Palace. Climbing the stairs on either side leads you to a trade floor teeming with chaos dwarves disguised as Red Axe directors and traders. They mutter incomprehensible words, obsessing over Zamorak and chaos.
Before you engage with any of the directors, an intriguing encounter awaits you. An adamant chaos dwarf blocks your entry through the eastern door, sternly denying access as you are not a member of the Red Axe. Undeterred, you decide to approach one of the Red Axe directors and relay that your friend aspires to join the malevolent organization.
The director, fueled by ambitions of power, seeks an opportunity to outshine his peers. Veldaban, recognizing the opportunity to infiltrate their ranks, proposes a plan - you must eliminate the remaining seven directors scattered across the floor. Their deaths would pave the way for the surviving director to declare you, or rather Veldaban, as a full-fledged member of the Red Axe.
With determination, you embark on a daring mission to dismantle the ranks of the Red Axe directors. As chaos ensues, you skillfully dispatch seven of the directors, leaving only the one with aspirations for ultimate power. Your actions draw attention, and the surviving director proclaims Veldaban as a bonafide member of the Red Axe. The false identity you've assumed serves as a strategic advantage in navigating the web of deceit woven by the Red Axe.
Pressing forward, you move through the eastern door, ready to confront the heart of this sinister organization. The stakes are high, and every decision you make will shape the course of this climactic encounter. With the fate of Keldagrim and the future of its people hanging in the balance, you must stay vigilant, for danger lurks around every corner. The epic conclusion of the "Birthright of the Dwarves" awaits you, and your resilience and cunning will be put to the ultimate test.

The final confrontation
As the final battle ensues, a swift and strategic route emerges, leading you from the cave at the end of the Barendir tunnel directly to the top floor of the Red Axe palace. With danger lurking around every corner, you must tread cautiously, for the threat of death looms ever-present. Should you fall in the midst of these intense battles, your grave will appear in the Barendir tunnel, akin to the previous confrontation.
If you find yourself in need of respite and wish to restock your supplies, you have the option to abandon the battle temporarily. Descend the palace stairs and log out to the lobby. Upon logging back in, you will find yourself at the Black Guard quartermaster, offering access to your bank, ensuring you're well-equipped for the trials that lie ahead.
The formidable battle unfolds in three distinct phases. First, you face Grimsson in his normal dwarf form. As the clash intensifies, you must harness your skills and determination to overcome his resistance.
Following this, a pivotal shift occurs, as Grimsson transforms into his chaos dwarf form, unleashing a torrent of malevolence upon you. In this altered state, his power and aggression are amplified, demanding your utmost focus and strategic acumen to outmaneuver his attacks and retaliate with precision.
Once Grimsson's chaos dwarf form is vanquished, the final phase awaits, as you confront Hreidmar in his own chaos dwarf manifestation. The encounter with Hreidmar poses a unique set of challenges, testing your combat prowess and resolve to the fullest.
Remarkably, upon completion of each phase, your progress will be retained should you leave and re-enter the battle. The Red Axe palace, shrouded in malevolence and secrets, bears witness to the culmination of your heroic journey.
As the fate of Keldagrim and its people hinges on your every move, remember that you are not alone in this grand quest. With allies by your side and your unwavering determination, you have the strength to face the darkness head-on and ensure that the light of justice prevails. The final moments of "Birthright of the Dwarves" beckon, and the resolution of this epic adventure draws near. Brace yourself for the ultimate test of heroism and courage, for the future of Keldagrim awaits your triumphant stand.
The Butcher of Barendir
The moment of truth arrives as the confrontation between Veldaban and Grimsson unfolds. The air is fraught with tension as a short cutscene plays, setting the stage for an intense battle to ensue.
With adrenaline coursing through Grimsson's veins, you must be vigilant, watching for the critical moment when his bar reaches full capacity. Once it does, Grimsson becomes Provoke Immune and launches a charge attack, inflicting devastating damage at a rapid pace. To shield yourself and Veldaban from this onslaught, you can utilize an ultimate ability or stun Grimsson, interrupting his charge attack.
As the battle progresses, Grimsson's adrenaline reaches 50%, and he seizes the opportunity to grab Veldaban for a brief period. During this precarious moment, any damage you deal to Grimsson will be redirected towards Veldaban, making it crucial to halt your attacks and focus on self-preservation. Following the brief grasp, Grimsson hurls Veldaban at you, causing a potent typeless 1000+ damage to you and a staggering 7500 to Veldaban. While you can find refuge behind a pillar to shield yourself from the damage, Veldaban remains exposed. Protecting him becomes paramount, for if he succumbs to the onslaught, the battle will restart.
To separate Grimsson from Veldaban, you devise a strategic plan. Opening the door to the throne room and stepping back a few paces, you allow Grimsson to throw Veldaban at you. As Veldaban is propelled out of the room, you swiftly close the door, positioning yourself between Veldaban and Grimsson. This tactical maneuver disrupts Grimsson's attacks on Veldaban, reducing their lethality. With swift and calculated moves, you engage in the battle, keeping both foes at bay.
As Grimsson falls to your might, a momentous cutscene unfolds, revealing Hreidmar's nefarious intentions. Armed with a dragon battlestaff, Hreidmar channels a spell, transforming himself, Veldaban, and the deceased Grimsson into chaos dwarves. Veldaban, unfortunately, succumbs to the spell, but he does not fully turn into a chaos dwarf, sparing you from facing another challenge.
With Veldaban's partial transformation, your focus now shifts to dealing with Hreidmar and Grimsson. The fate of Keldagrim rests on your shoulders, and the epic conclusion of this grand quest, "Birthright of the Dwarves," draws near. Summon your courage, marshal your strength, and face the impending darkness with unwavering determination. The destiny of Keldagrim and its people awaits your triumphant stand.

As the chaos dwarves Hreidmar and Grimsson stand before you, ready to unleash their malevolence, Veldaban lies incapacitated and unable to lend his aid. Your mettle is tested like never before, as each chaos dwarf boss poses a formidable challenge in their own right. To prevail, a strategic approach is key, and many adventurers choose to engage them one at a time to enhance their chances of success.
Separating the bosses is crucial, and a tried-and-true method involves using the stairway. By descending the stairs and then ascending back up, Hreidmar becomes unaggressive, creating an opportunity to tackle Grimsson first. The bottom of the stairway also serves as a safe spot, allowing you to heal and regroup if needed.
In the relentless duel with Grimsson, keep a keen eye on his adrenaline bar. When it reaches its pinnacle, Grimsson launches a deadly charge attack, dealing rapid and severe damage. To evade this onslaught, swiftly retreat down the stairs when the warning message appears.
With Grimsson defeated, your focus shifts to Hreidmar, who wields potent magic and commands a range of special abilities:
1. He can summon chaos dwarves in pairs of cannoneers and warriors, with no limit to their numbers. The warriors may flash red, signifying their imminent explosion and substantial damage upon contact with you. They can also lose 5000 health if not detonated.
2. Hreidmar has the ability to swap places with a cannoneer, disrupting your targeting and attacking patterns.
3. When his adrenaline reaches 50%, he empowers the cannoneers, augmenting their attack potency without draining his own adrenaline.
4. At full adrenaline, Hreidmar can perform a special ultimate ability, healing himself and any chaos dwarves by up to 20% of their maximum health.
To separate Hreidmar from his minions, two effective methods can be employed: standing in the doorway and closing it when minions are summoned, or using the stairway tactic to make Hreidmar non-aggressive while dealing with the minions. Be cautious of the supercharged minion blast, which can damage you through walls and down stairs.
When facing Hreidmar, closely monitor his adrenaline bar. At full capacity, he attempts to heal himself for 12,000 life points, a formidable challenge to counteract. Employing powerful ultimate abilities, like Omnipower, or high-damage thresholds proves effective in preventing his healing. Likewise, when Hreidmar empowers the summoned hand cannoneers, the same approach can thwart their augmented attack potency.
In the midst of this intense clash, maintain a balance between dealing damage, using adrenaline for recovery through abilities like Regenerate, Rejuvenate, or Guthix's Blessing, and reserving enough adrenaline to combat Hreidmar.
As the battle rages on, your determination and strategic acumen will be put to the ultimate test. Each decision you make bears weight on the outcome of this climactic confrontation. With courage in your heart and a steadfast spirit, rise to the challenge and stand tall against the forces of chaos. The destiny of Keldagrim hangs in the balance, and your valor will shape the future of its people. The epic conclusion of "Birthright of the Dwarves" beckons, and the fate of an entire city rests in your hands.
The heir to the throne
As the fierce battle with Hreidmar and Grimsson reaches its climax, you emerge victorious, having vanquished the chaos dwarves and thwarted their malevolent plans. With the chaos subsiding, you turn your attention to Veldaban, who kneels before you in the throne room. He reveals the dire consequence of the transformation he's undergoing and makes a poignant request—to end his life, hoping to halt the transformation's progression.
In this moment of reckoning, you are faced with a profound choice. The weight of Veldaban's fate rests on your shoulders. Will you grant him the mercy he seeks or allow him to continue his struggle against the encroaching darkness?
Whatever your decision, a momentous cutscene unfolds, as trolls and dwarves unite to topple the statue of Hreidmar, symbolizing the end of his oppressive rule.
If you choose to spare Veldaban, the two of you will engage in a crucial discussion with the Consortium. Together, you must determine the future of Keldagrim's leadership. Will you support Veldaban's rule or advocate for the Consortium to govern the city?
On the other hand, if you decide to fulfill Veldaban's request and end his life, a path opens for you to explore the true heir to the throne: King Drunken Dwarf III. This revelation opens new possibilities for the future of Keldagrim's rulership.
As the quest concludes, you witness the aftermath of your choices, each thread of destiny woven with the impact of your decisions. Should you have spared Veldaban, you'll find him remarkably unaffected by the chaos dwarf transformation, a testament to his resilience and inner strength.
Regardless of your choices, the quest comes to a close, and the fate of Keldagrim finds its resolution. The echoes of your deeds will ripple through the annals of history, shaping the destiny of an entire city and its inhabitants.
Congratulations on completing this grandmaster quest, a testament to your bravery, resourcefulness, and moral compass. Your journey through "Birthright of the Dwarves" has left an indelible mark on the world of Gielinor. As the quest curtains close, know that your legacy as a valiant hero is forever etched in the annals of RuneScape