

 5 MYSTERY GIFTS


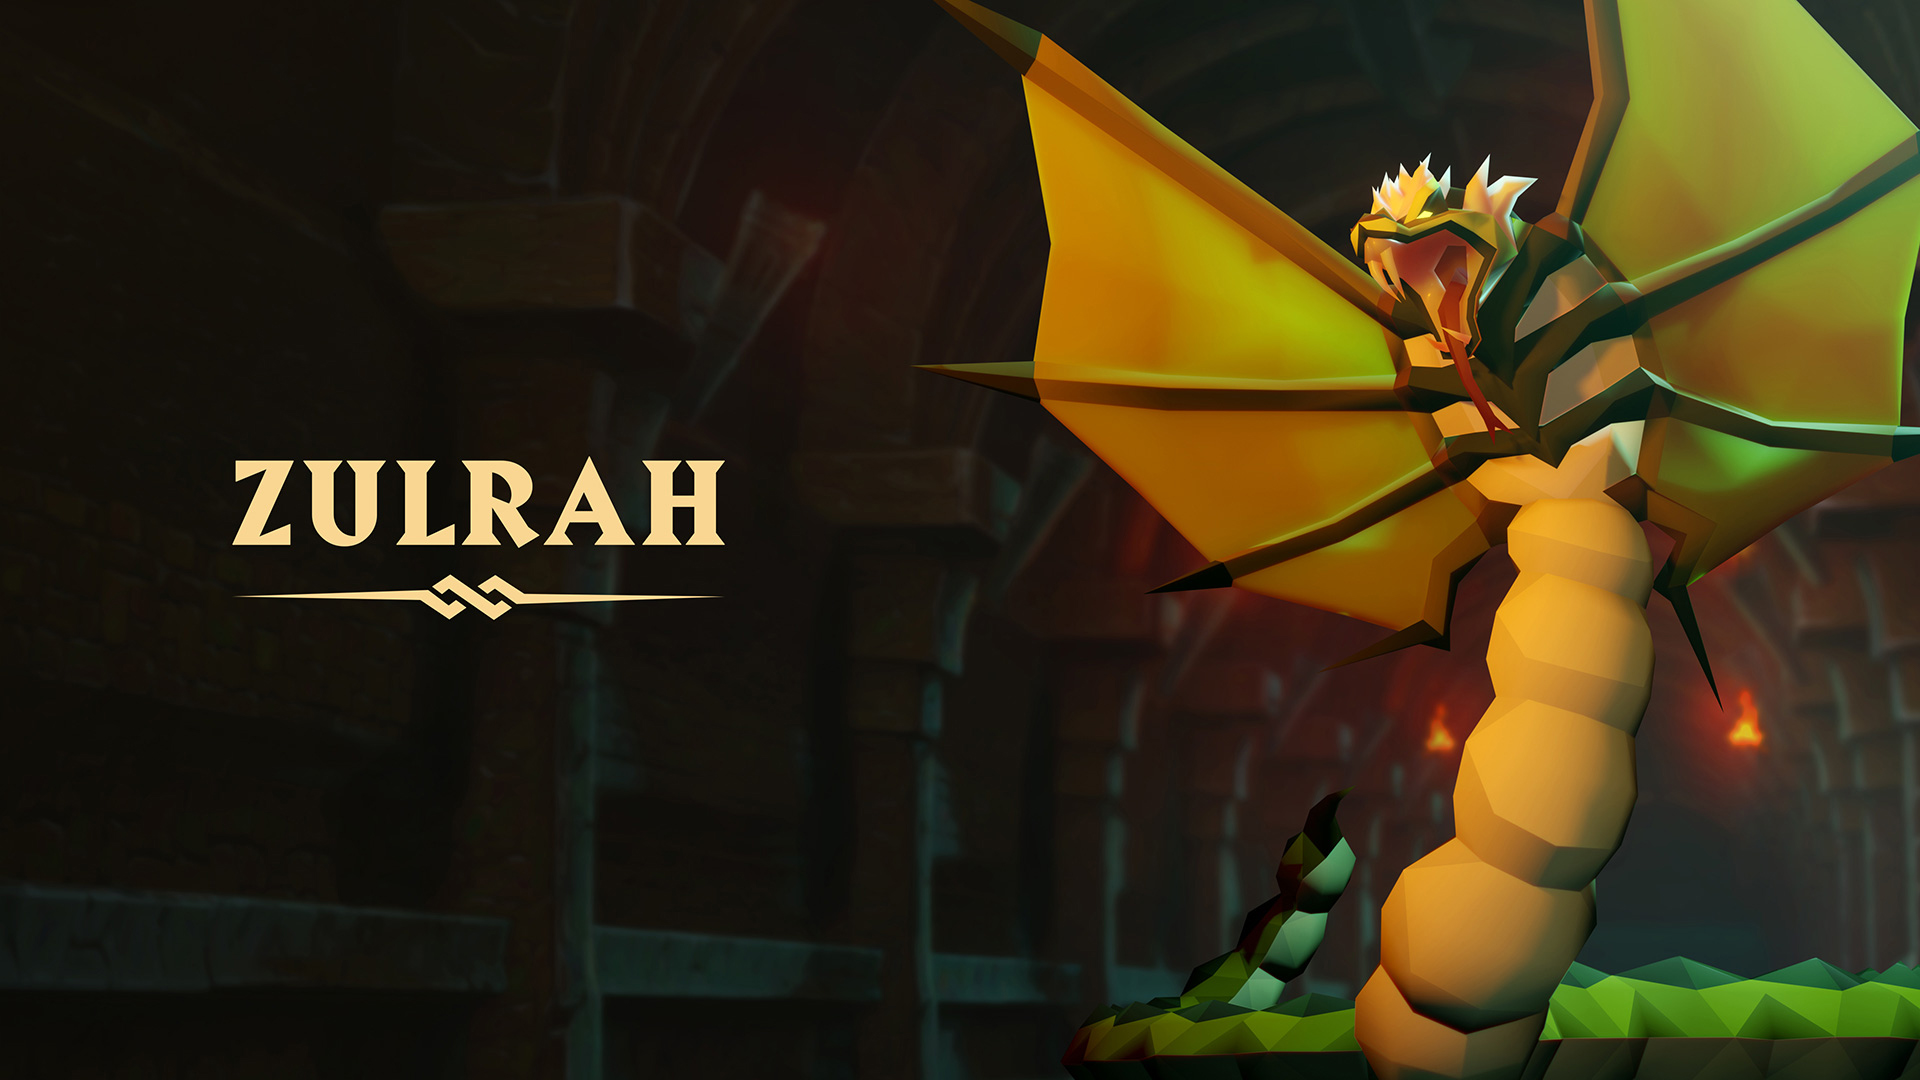
Zulrah Guide OSRS
Step into the mysterious realm of Old School RuneScape, where epic challenges and mythical creatures await. Among the formidable adversaries that seasoned adventurers face, one serpent boss stands out Zulrah. This level 725 solo-only boss, shrouded in mystery, demands a strategic approach, combining ranged and magic attacks to conquer its unique forms. As we unveil the secrets of Zulrah, the call echoes for new players to join the adventure in the Season of Discovery.
Zulrah's history is as enigmatic as its slithering form. Created during the Dragonkin Conflicts as an experiment gone awry, Zulrah emerged from the Poison Waste as an unexpectedly powerful and intelligent serpent. Worshipped as a god in the village of Zul-Andra, adventurers have ventured into the swamp to face this ancient deity. As the serpent rises from the murky waters, the story unfolds, challenging those who dare to enter.
Does VIRTGOLD offer Powerleveling Services for me?
Yes! In fact, our team of expert Powerlevelers has mastered every inch of efficient OSRS training methods, and we're ready to help you accomplish the same feat. Whether you're a seasoned adventurer or just starting out, our personalized approach ensures that you'll receive the most affordable prices and most skilled workers to come out on top. So why wait? Take on the grind of OSRS with confidence, thanks to VIRTGOLD. Want to skip the grind all together? Consider our other services such as Currency and Questing!

Getting there
Zulrah is located at a shrine east of Zul-Andra. Players can quickly get here by:
1. Taking a charter ship to Port Tyras and then running south
2. Using the fairy ring code "b-j-s" to the small island west of Zul-Andra, and then leaping across the stepping stones (requires 76 Agility, can be boosted)
3. Using a Zul-andra teleport scroll
All of these methods require completion of Regicide.
Zulrah's Shrine is accessed by boarding the sacrificial boat. Upon entering the shrine, a still scene of the shrine will be shown with a prompted dialogue. Zulrah will appear as soon as the player continues the dialogue or performs an action. The only way to escape from the shrine is by killing Zulrah, teleporting, logging out, or dying.
Recommended Skills
![]() Magic 85+
Magic 85+
![]() Ranged 80+
Ranged 80+
![]() Defence 70+
Defence 70+
![]() Hitpoins 80+
Hitpoins 80+
![]() Prayer 44+
Prayer 44+
![]() Construction 82+ optional (In order to boost for Ornate rejuvenation pool)
Construction 82+ optional (In order to boost for Ornate rejuvenation pool)
Fight Overview
The shrine is a small U-shaped island with two pillars in the middle corners, and Zulrah rotates in the swampy water around the island throughout the fight. It cannot be reached with melee (with the exception of halberds to which it is immune), making Ranged and/or Magic necessary to fight it. Damage at Zulrah is capped at 50, with any hits greater than this amount dealing anywhere from 45-50 damage.
Furthermore, it periodically switches forms that have varying resistance to Ranged and Magic, so using both is recommended. In turn, Zulrah attacks with Ranged and Magic, as well as an avoidable Melee attack where it targets the player with its tail, depending on its form. It can also summon snakelings, smaller versions of itself, on the platform to attack the player, along with toxic clouds that deal rapid damage if they stand in one.
Zulrah and its snakelings inflict venom with their attacks, an enhanced version of poison that increases its damage the longer it has affected the player, starting at 6 damage per hit and increasing up to 20. Standard poison protection will only reduce it to regular poison and will not grant any immunity; anti-venom or anti-venom+ or wearing a serpentine helm are much more effective for eliminating and preventing venom.
Zulrah has different forms throughout the fight, distinguishable by its colour, which designates its attack style and weakness. It changes forms by diving into the swamp and resurfacing somewhere else, which it does periodically. It may spawn snakelings and toxic clouds in any form.
When Zulrah is green, it attacks with Ranged. It is weak to Magic.
At approximately 2 minutes, Zulrah will be in its green form and attack with alternating Ranged and Magic attacks (colloquially called "Jad phase").
If the fight takes a long time (3+ minutes), it is possible for Zulrah to be in its green form and attack randomly with Ranged and Magic.
When Zulrah is blue, it attacks with Ranged and Magic. It is weak to Ranged. Due to the Magic attacks being more common and more accurate, it is recommended to use Protect from Magic. Zulrah can attack with Ranged up to five times in succession.
When Zulrah is red, it uses a typeless attack wherein it swings its tail at the player's position, which can be avoided by moving two tiles away; if it hits, it will deal heavy damage and stun the player. It is more resistant to damage in this phase than in the other two forms, but Magic is typically more effective than Ranged.
The forms and when and where Zulrah spawns snakelings and toxic clouds is not random: there are four possible patterns for the fight that dictate what it will do next. It always starts in its green form and spawns toxic clouds to cover most of the arena, after which it is randomly chosen which of the four patterns the fight will be. Further information can be read on the strategy article.


Deciphering Zulrah's Phases
The battle with Zulrah is not a straightforward clash; it's a dance of changing forms and deadly attacks. Zulrah transitions between green, blue, and red forms, each with its unique strengths and weaknesses. Players must adapt, using both ranged and magic attacks to exploit vulnerabilities while avoiding venomous clouds and the relentless assault of summoned snakelings.
1. Zulrah's serpentine form, in which it will attack with Ranged, with a few exceptions such as its "Jad" phase (see rotations). While in this form, Zulrah is weak against magical attacks - possessing -45 magic defence and +50 ranged defence.

2. Zulrah's magma form, in which it will attack with Melee. Zulrah will stare at the player's position for several seconds before whipping its tail at that area. If the player does not move away from the targeted area in time, they will be dealt up to 30 damage and be stunned for several seconds. While in this form, Zulrah is still weak against magical attacks - possessing +0 magic defence and +300 ranged defence.

3. Zulrah's tanzanite form, in which it will randomly attack with both Magic and Ranged attacks, although it uses magic much more frequently compared to ranged. While in this form, Zulrah is weak to ranged attacks - possessing +300 magic defence and +0 ranged defence.

Special attacks
Snakelings

Snakelings are monsters that Zulrah will summon during the fight via shooting white orbs. Each snakeling attacks with either magic or melee, but never both. Despite their moderately high combat level of 90, they have extremely low defence and only 1 Hitpoint, however this is made up for by their incredibly accurate attacks, which can hit up to 15.
Protection prayers block their attacks; however, it is better to tank the snakelings' attacks if Zulrah is also attacking, since Zulrah can deal more damage, and it is nearly impossible to flick multiple snakelings and Zulrah attacking together. It is highly recommended to bring a ring of recoil or ring of suffering(r/ri) to kill the snakelings.
While snakelings spawn immediately, in some of Zulrah's attack rotations, it will occasionally throw a white orb and then dive into the swamp. The summoned snakeling will only appear after Zulrah reemerges from the swamp.
If you are hiding from Zulrah, it is best to use this time to kill the snakelings as to lessen the need to eat and/or use recoil charges during the fight.
Snakelings will also die off if they have been lingering around for more than 40 seconds, regardless if they are in combat with the player or not, although this generally occurs when the snakeling is stuck and cannot reach the player. They will automatically die off with Zulrah when it is killed.
Venom Clouds

Zulrah will spawn venomous clouds during the fight via a barrage of dark-green orbs. If a player stands within a cloud's 3x3 area, they will be dealt varying damage per tick which can add up quickly. Players will want to position themselves accordingly for each phase as to minimise the potential damage from these clouds.
Certain phases may force the player to run through venom clouds in order to re-position themselves. Doing so will deal some damage to the player, however, this is a much better outcome than the potential damage inflicted by an unprepared Zulrah attack.
Similarly to the snakelings, if Zulrah launches a dark-green orb just as it dives, the venomous cloud will not appear until Zulrah resurfaces.
While these clouds inflict venom damage, they do not envenom the player.
Overcoming the Venomous Challenge
Zulrah's venomous clouds pose a constant threat during the battle. Players must maneuver carefully to minimize damage, positioning themselves strategically to avoid the deadly clouds. Beyond Zulrah's physical attacks, the venom adds an extra layer of complexity, making every move crucial for survival.
Setup
Ideally, the best set-up entails using both Ranged and Magic, to exploit Zulrah's weaknesses. Those using the twisted bow can opt for a single-style setup, as Zulrah's high Magic level makes it very accurate against the serpentine and tanzanite forms. A magic switch is optional to deal with the magma form due to its increased ranged defence.
Beginners may find it easier to bring fewer Magic/Ranged switches until they are comfortable with Zulrah's mechanics and phases. Zulrah is only weak to Ranged while in tanzanite (blue) form; therefore, it is best to opt for a Magic-based approach.
A serpentine helm is very useful for its immunity to venom, despite it having negative Magic and Ranged bonuses. It prevents the need for anti-venom+ potions, therefore freeing up an inventory slot, but over time it's less cost efficient than the potions, considering it needs to be charged with Zulrah's scales. It's recommended for beginners to wear the Serpentine helm until they are able to kill Zulrah consistently.
For banking and teleportation, there are several ways to do so:
1. Teleport to house tablet along with an ornate rejuvenation pool in the player's Superior Garden can be used to quickly restore stats, then using a ring of dueling in the player's jewellery box in their Achievement Gallery to bank at Castle Wars or the Crafting Guild, then returning to their house and using the fairy ring (code bjs) to reach the Zul-Andra stepping stone, requiring level 76 Agility (can be boosted).
2. Zul-andra teleport scrolls will take you directly next to the dock, which is about 20 seconds faster than using the Fairy ring. Despite their high cost, they are always worth using once you are able to kill Zulrah consistently without as many deaths, because the price is offset by the extra kills per hour.
3. Players with lower level Construction can use a ring of dueling to teleport to Ferox Enclave, restock with the bank chest, and drink from the Pools of Refreshment to the west to instantly cure venom, restore Hitpoints, and recharge Prayer.
4. Players can also use a Quest point cape or Slayer ring teleport to quickly reach a fairy ring. Alternatively, Salve Graveyard Teleports or their magic tablet variants can be used to reach a fairy ring quickly as well. This too requires level 76 in Agility.
5. If the player cannot use the agility shortcut, bring a Catherby teleport instead and run south to Catherby's docks and charter a ship to Port Tyras. This will require 3,200 coins (1,600 with Cabin Fever/Ring of Charos or 800 with both). A Khazard teleport tablet or the Fishing Trawler grouping teleport can also be used to access a charter boat.
Recommeded Equipment
Magic Only:
| Slot | Option 1 | Option 2 | Option 3 | Option 4 | Option 5 |
|---|---|---|---|---|---|
 |
 Slayer helmet (i) or Slayer helmet (i) or  Ancestral hat Ancestral hat |
 Ahrim's hood Ahrim's hood |
 Farseer helm Farseer helm |
 Void mage helm Void mage helm |
N/A |
 |
 Occult necklace Occult necklace |
 Amulet of fury Amulet of fury |
 Amulet of glory Amulet of glory |
 Amulet of power Amulet of power |
N/A |
 |
 Imbued god cape Imbued god cape |
 God capes God capes |
 Cape of Accomplishment Cape of Accomplishment |
N/A | N/A |
 |
 Ancestral robe top Ancestral robe top |
 Ahrim's robetop Ahrim's robetop |
 Dagon'hai robe top Dagon'hai robe top |
 Elite void top Elite void top |
N/A |
 |
 Ancestral robe bottom Ancestral robe bottom |
 Ahrim's robeskirt Ahrim's robeskirt |
 Dagon'hai robe bottom Dagon'hai robe bottom |
 Elite void robe Elite void robe |
N/A |
 |
 Tumeken's shadow Tumeken's shadow |
 Harmonised nightmare staff Harmonised nightmare staff |
 Sanguinesti staff Sanguinesti staff |
 Trident of the swamp Trident of the swamp |
 Trident of the Trident of the |
 |
 Elidinis' ward (f) Elidinis' ward (f) |
 Arcane spirit shield Arcane spirit shield |
 Tome of fire Tome of fire |
 Malediction ward Malediction ward |
 Book of darkness Book of darkness |
 |
 Rada's blessing 4 Rada's blessing 4 |
 God blessing God blessing |
|||
 |
 Tormented bracelet Tormented bracelet |
 Barrows gloves Barrows gloves |
 Combat bracelet Combat bracelet |
 Void knight gloves Void knight gloves |
|
 |
 Eternal boots Eternal boots |
 Infinity boots Infinity boots |
 Boots of brimstone Boots of brimstone |
 Bloodbark boots Bloodbark boots |
 Wizard boots Wizard boots |
 |
 Magus ring Magus ring |
 Ring of suffering (r) Ring of suffering (r) |
 Ring of recoil Ring of recoil |
N/A | N/A |
Magic & Ranged:
| Slot | Option 1 | Option 2 | Option 3 | Option 4 | Option 5 |
|---|---|---|---|---|---|
|
Ancestral hat &  Masori mask (f) Masori mask (f) |
Ahrim's hood &  Armadyl helmet Armadyl helmet |
 Infinity hat & Infinity hat &  Blessed coif Blessed coif |
Farseer helm &  Karil's coif Karil's coif |
Void mage helm &  Void ranger helm Void ranger helm |
|
Occult necklace &  Necklace of anguish Necklace of anguish |
Amulet of fury |
Amulet of glory |
Amulet of power |
N/A |
|
Imbued god cape /  Ava's assembler Ava's assembler |
God capes /  Ava's accumulator Ava's accumulator |
Cape of Accomplishment |
N/A | N/A |
|
Ancestral robe top &  Masori body (f) Masori body (f) |
Ahrim's robetop &  Armadyl chestplate Armadyl chestplate |
Dagon'hai robe top &  Blessed body Blessed body |
 Infinity top & Infinity top &  Black d'hide body Black d'hide body |
Elite void top |
|
Ancestral robe bottom &  Masori chaps (f) Masori chaps (f) |
Ahrim's robeskirt &  Armadyl chainskirt Armadyl chainskirt |
Dagon'hai robe bottom &  Blessed chaps Blessed chaps |
 Infinity bottoms & Infinity bottoms &  Black d'hide chaps Black d'hide chaps |
Elite void robe |
|
Tumeken's shadow &  Twisted bow Twisted bow |
Harmonised nightmare staff &  Bow of faerdhinen Bow of faerdhinen |
Sanguinesti staff &  Toxic blowpipe Toxic blowpipe |
Trident of the swamp & Toxic blowpipe |
Trident of the seas & Toxic blowpipe |
|
Elidinis' ward (f) |
Tome of fire |
Arcane spirit shield |
Malediction ward |
Book of darkness |
|
Rada's blessing 4 |
God blessing |
|||
|
Tormented bracelet &  Zaryte vambraces Zaryte vambraces |
Barrows gloves |
Combat bracelet |
N/A | Void knight gloves |
|
Eternal boots &  Pegasian boots Pegasian boots |
Infinity boots &  Ranger boots Ranger boots |
Bloodbark boots &  Blessed boots Blessed boots |
Wizard boots |
Boots of brimstone |
|
 Ring of suffering (ri) Ring of suffering (ri) |
Ring of suffering (r) |
Ring of recoil |
N/A | N/A |
Ranged Only:
| Slot | Option 1 | Option 2 | Option 3 | Option 4 | Option 5 |
|---|---|---|---|---|---|
|
Masori mask (f) |
Armadyl helmet |
 Crystal helm Crystal helm |
 Serpentine helm Serpentine helm |
Blessed coif |
|
Necklace of anguish |
Amulet of fury |
Amulet of glory |
N/A | N/A |
|
Ava's assembler |
Ava's accumulator |
 Ranging cape Ranging cape |
N/A | N/A |
|
Masori body (f) |
Armadyl chestplate |
 Crystal body Crystal body |
 Karil's leathertop Karil's leathertop |
Blessed body |
|
Masori chaps (f) |
Armadyl chainskirt |
 Crystal legs Crystal legs |
 Karil's leatherskirt Karil's leatherskirt |
Blessed chaps |
|
Twisted bow |
Bow of faerdhinen |
N/A | N/A | N/A |
|
Rada's blessing 4 |
N/A | |||
|
Zaryte vambraces |
Barrows gloves |
 Dragon gloves Dragon gloves |
 Blessed vambraces Blessed vambraces |
 Black d'hide vambraces Black d'hide vambraces |
|
Pegasian boots |
Ranger boots |
Blessed boots |
Boots of brimstone |
 Shayzien boots (5) Shayzien boots (5) |
|
Ring of suffering (ri) |
Ring of suffering (r) |
Ring of recoil |
N/A | N/A |
 |
Toxic blowpipe |
N/A | N/A | N/A | N/A |
Inventory
1. Toxic blowpipe – The blowpipe is useful for restoring some health with the special attack, ideally on the blue phase.
2. 1 Bastion potion/Divine ranging potion
3. 1-2 Anti-venom+
4. 1 Prayer potion
5. 4+ Cooked karambwan to combo eat at low Hitpoints
6. 1 Ring of dueling (for Ferox Enclave teleport to restore stats post-kill)
7. 5+ Zul-andra teleport or Quest point cape for a close teleport to a Fairy ring if you have 76 Agility for Zul-andra shortcut (71 with summer pie)
8. Rune pouch with runes to cast Vengeance
9. Rest Sharks or better for longer trips
The Reward of Conquering Zulrah
| Item | Quantity | Rarity | Price |
|---|---|---|---|
 |
Tanzanite fang | 2 × 1/1,024 | 2,441,402 |
 |
Magic fang | 2 × 1/1,024 | 2,422,734 |
 |
Serpentine visage | 2 × 1/1,024 | 2,428,496 |
 |
Uncut onyx | 2 × 1/1,024 | 2,292,467 |
 |
Tanzanite mutagen | 2 × 1/13,106 | Not sold |
 |
Magma mutagen | 2 × 1/13,106 | Not sold |


