

 5 MYSTERY GIFTS

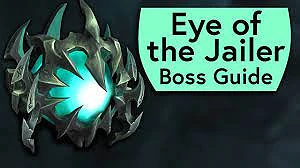
WoW Shadowlands Eye of the Jailer Guide

The following guide will provide you with the necessary information required to defeat The Eye of the Jailer on Normal and Hard Difficulty levels. Speaking of the NPC, he is the second most powerful boss in the raid; Sanctum of Domination and its percentage-based intermission has been triggered at 66%, and the rest 33% is when the boss enters the 3rd phase. In every phase, you’ll be fighting against The Eye of the Jailer, and after every intermission, two Death Seeker Eyes will spawn, who you’ll have to defeat to end the stage.

Quicks Tips
General: Remember to move out of the Fractured Soul impact zone, and if you’re hit by it, make sure to collect your Soul Shards to remove the de-buffs. You can use Grapple to avoid the hits dealt by Annihilating Glare. It’s best that you wait for the Death Seeker Eyes to spawn before getting close to the location. Be wary of Desolation Beam and Spreading Misery, because they’re both deadly attacks where you’ll have to move away.

Tanks: Remember to Taunt Swap after each Death Link cast, and when you’re in phase 2, split up, focus on each of the Death Seeker Eye and lure them to the back of the platform. It’s suggested that you keep the Death Seeker Eyes at least 30 yards away from each other so that you can avoid triggering the Suffering spell.
Healers: Remember to dispel the effects of Slothful Corruption that has affected the team members. You can move towards using healing cooldowns during the Titanic Death Gaze spell in phase 2 and focus on using health re-distribution cooldowns, as well as damage reduction cooldowns when the Immediate Extermination spell stacks high.
DPS: Remember that your role is to focus and kill both the Death Seeker Eyes within 8 seconds so that you can prevent the ability - Suffering from being triggered. Use Time Warp in the final phase, and defeat the boss before the ability Immediate Exterminations stacks high because it can be deadly.

The Eye of the Jailer: Abilities & Strategies
During phase 1, the encounter will repeat twice and will require a good sense of dodging the simple mechanics, such as Fractured Souls and Annihilating Glare. Once it’s done, the second phase will begin where two Death Seeker Eyes will spawn and the raid must take upon themselves to split accordingly and defeat each one of them. It’s best that you send half of the tanks, DPS and healers towards one and the other half towards the other to form a proper sequence. Use the back of the encounter area to avoid Spreading Misery pool, and spread loosely so that you can avoid being hit by Desolation Beams.
Finally, the third phase will begin, where the group will have a limited amount of time to defeat the boss because its Immediate Extermination de-buff reduces the amount of healing power taken by players. It’s best that during the ability, you spread across the centre of the room and use Time Wrap to clear the phase as quick as possible.
The Eye of the Jailer (100% - 30%)
Fractured Soul: During this ability, the boss will attack random players, causing shadow damage and splitting them into three fractured souls. Each of these souls reduces movement speed, healing done, and damage until the player walks over the soul to regain the abilities. The best way to deal with this ability is to avoid it.
Annihilating Glare: During this ability, the boss will start to channel it at one side of the platform and then sweep it across the area. It can cast this spell on either side of the platform, and once it has decided on which side it is going to channel it, the raid should move onto the opposite point and activate the action button to grapple to the other side.
Piercing Lens: During this ability, the boss will inflict severe damage onto its current target, but if you know the standard tank-busting mechanic then you should be okay.
Death Link: During this ability, it periodically damages its main target with a physical hit that also inflicts upon the other members of the raid. It’s suggested that you taunt swap after each Deathlink spell, and use damage mitigation cooldowns after each one to avoid exceeding damage.
The Eye of the Jailer (66% - 30%)
Death Seeker Eye: During this intermission, two Death Seeker Eyes will spawn at each side of the platform. The best way to deal with them is to separate them at least 30 yards apart to the back of the room and kill them within 8 seconds to avoid the spell Suffering from being triggered.
Slothful Corruption: During this ability, random targets will start to get fatigued through shadow damage, while lowering their ranged attack speed, movement speed, and spell casting by 40%. Healers should be ready to dispel any affected raid members.

Spreading Misery: If you’re affected by this ability, you’ll drop a pool of Jailer’s misery, which will continue through the encounter. The best strategy would be to drop the pool in the corners or near the walls so that there’s enough space to move around.
Desolation Beam: These beams are quite deadly and it targets players at random while chaining the ones standing near them. To avoid luring multiple players in, the best solution is to spread apart from each other.
Titanic Death Gaze: During the intermission, The Eye of the Jailer will cast Titanic Death Gaze which deals significant damage upon the players. The best solution would be to assign healing cooldowns so that you can ease the damage.
The Eye of the Jailer (30% - 0%)
Immediate Extermination: At 23% intermission, the boss will move towards the final phase, where he’ll gain the ability to cast a dreadful spell known as Immediate Extermination. This spell reduces 10% of the healing power received by the raid and increase the attack rate of the boss. The reduction of the healing power will take place until every member loses the ability to heal. However, you can use Health sharing effects and absorbs, such as Spirit-Link Totem and try to survive.
The Eye of the Jailer: Heroic Mode

The only difference in Heroic difficulty mode is the addition of Stygian Abductors, who float near the boss and target random players with the ability Dragging Chains. To reduce the effects of this pull, the raid members will have to stand near the targeted player. Once they land on the ground, their ability will change to Assailing Lance, but you can easily defeat them with a tank’s taunt swap.

![[Dragonflight] Death Knight Guide](https://d3p9x0g8yuku7f.cloudfront.net/media/thumbnails/thumbnails/HD-wallpaper-warcraft-world-of-warcraft-world-of-warcraft-dragonflight-thumbnail.jpg.350x216_q90_detail_format-WEBP.webp)