WoW Season of Discovery Warlock Phase 2

Welcome to our comprehensive guide to the new Warlock runes introduced in Phase 2 of the Season of Discovery in World of Warcraft. Below, you'll find detailed information, including exact locations, maps, and walkthroughs for all discovered Warlock runes up to Level 40.
Warlock runes are essential elements that enhance your abilities and prowess as a Warlock in World of Warcraft. As you journey through the Season of Discovery, uncovering these runes will greatly augment your gameplay experience.
 Grimoire of Synergy (Belt):
Description: Recite from a dark tome, granting damage done by you or your summoned demon a 5% chance to increase the damage done by the other by 5% for 15 sec. Recitation lasts 30 min.
(Proc chance: 5%)
Grimoire of Synergy Rune Location: To obtain the elusive Grimoire of Synergy rune, you must embark on a continuation of the questline for the Metamorphosis rune. Here's a step-by-step guide to locating this powerful artifact:
1. Prerequisite: Completion of the Metamorphosis Rune Questline: Before seeking the Grimoire of Synergy, ensure you have completed the questline for the Metamorphosis rune. Without accomplishing this prerequisite, you won't be able to proceed.
2. The Barrens:
- At level 30, you'll receive a mail instructing you to return to the Warlock camp located at coordinates /way 49.2 57.2.
- Upon arrival, Raszel Ander will offer you a new quest titled "A Solid Foundation" along with an invaluable invisibility potion.


3. Ashenvale:
- Make your way to Bough Shadow, situated near the Ysondre World Boss area in Ashenvale.
- Utilize the invisibility potion provided earlier to bypass two formidable level 60 elites guarding the area.
- Search for a lootable tree amidst the shadows and claim the coveted Bough of Shadows.
4. Return to Raszel Ander:
- Despite acquiring the Bough of Shadows, your journey is far from over. You'll find yourself afflicted with a debilitating shadow damage over time effect that gradually saps your life force.
- Employ Shadow Ward to mitigate the damage and utilize healing abilities to sustain yourself through this ordeal.
- Remember, the potency of the shadow dot scales with your maximum health, so minimizing any additional penalties such as resurrection sickness is crucial to your survival.
5. Obtain the Soul Vessel:
- Raszel Ander will task you with acquiring a Soul Vessel, a critical component in your quest for the Grimoire of Synergy.
- Craft the Soul Vessel using Engineering skills (205) with the following materials: 4x Shadowgem, 1x Demonic Figurine, and 1x Black Vitriol.
- Acquire the schematic for the Soul Vessel from reputable vendors such as the Azeroth Commerce Authority or Durotar Supply and Logistics, available for purchase with Honored reputation.
- Shadowgem is readily obtainable from low-level mobs and mining, while Black Vitriol poses a greater challenge, being a rare drop from high-level mining endeavors.
6. Journey to Mannoroc Coven:
- Once in possession of the Soul Vessel, your final destination awaits at the Mannoroc Coven in southern Desolace (coordinates /way 54 80).

- Present the Soul Vessel to the designated recipient and claim your rightful reward: the Grimoire of Synergy rune.
Prepare yourself for the challenges that lie ahead, for the Grimoire of Synergy holds untold power, waiting to be unleashed by those brave enough to seek it.
 Invocation (Belt):
Description: Refreshing Corruption, Immolate, Curse of Agony, or Siphon Life when it has less than 6 seconds duration remaining will cause you to deal instant damage to the target equal to the spell's remaining periodic damage.
Locating the Invocation Rune: To acquire the elusive Rune of Invocation, a key component for mastering the malevolent art of Invocation, follow these steps through the shadows of Stormgarde Keep in the Arathi Highlands:
1. Gather Conjuror's Pendants:
- Venture into the depths of Stormgarde Keep and seek out Syndicate Conjurors.

- Engage and defeat these dark conjurors until you collect a total of 10 Conjuror's Pendants.
2. Harvest the Soul of the Void:
- Focus your dark arts on the Voidwalker minions that accompany the Syndicate Conjurors.
- Utilize your Drain Soul ability on these Voidwalker minions to extract the elusive Soul of the Void. Be patient, as persistence in your sinister endeavors will be rewarded.
3. Assembling the Components:
- Ascend to the top floor of the house within Stormgarde Keep, where the Void Prism awaits.
- Combine the gathered Conjuror's Pendants with the extracted Soul of the Void upon the Void Prism. This unholy union is the first step towards unlocking the Rune of Invocation.
4. Confront the Void Seeker:
- The merging of Conjuror's Pendants and the Soul of the Void on the Void Prism will beckon the manifestation of a formidable Void Seeker.
- Prepare for a dark confrontation as you face the Void Seeker that emerges from the shadows.
5. Triumph and Claim the Rune:
- Vanquish the Void Seeker and claim victory over the shadowy adversary.
- Among the remnants of the void, you shall discover the Rune of Invocation, a symbol of your mastery over the dark arts.
 Shadow and Flame (Belt):
Description: Your critical strikes with Fire and Shadow spells increase your Fire and Shadow damage done by 10% for 10 sec.
Shadow and Flame Rune Location: To obtain the coveted Shadow and Flame Rune, follow these clandestine steps through the shadows of Desolace, Booty Bay, and Arathi Highlands:
1. Desolace Quest Start: Begin your adventure by obtaining the "![]() Highway Robbery" quest in Desolace. Locate an Extinguished Campfire northwest of the Kodo Graveyard at coordinates /way 47 54.
Highway Robbery" quest in Desolace. Locate an Extinguished Campfire northwest of the Kodo Graveyard at coordinates /way 47 54.

2. Desolace - On the Lam: Head to /way 63 39 near Kormek's Hut in Desolace. Turn in the "![]() Highway Robbery" quest to Bibbly F'utzbuckle and pick up the quest "
Highway Robbery" quest to Bibbly F'utzbuckle and pick up the quest "![]() On the Lam."
On the Lam."

3. Booty Bay - Cherry for Your Thoughts?: Journey to Booty Bay and visit the inn. Turn in "![]() On the Lam" to Tokal and acquire the quest "
On the Lam" to Tokal and acquire the quest "![]() Cherry for Your Thoughts?". Purchase Cherry Grog for the next part of your quest, "
Cherry for Your Thoughts?". Purchase Cherry Grog for the next part of your quest, "![]() No Honor Among Thieves."
No Honor Among Thieves."

4. Arathi Highlands Bridge: Seek out a rowboat located under the bridge between Arathi Highlands and the Wetlands, approximately at /way 53 91 on the Arathi Highlands map. Interact with the boat to teleport to the eastern shore.

5. Confront Illari Duskfeather: Locate Illari Duskfeather and engage in conversation. For most races, two equally hostile dialogue options will be presented. Choose one to initiate combat with Illari. Defeat her, collect the dropped bag, and loot Illari's Key.
6. Unlock the Treasure: Utilize Illari's Key to unlock the Jewel-Encrusted Box. Open the box and claim your well-earned Rune.
Note: Night Elves have a peaceful dialogue solution available, and if chosen, Illari will provide them with Illari's Key for the Jewel-Encrusted Box. May the arcane winds guide you through this intricate quest, and may the Shadow and Flame Rune enhance your magical prowess!
 Dance of the Wicked (Boots):
Description: You and your demon pet gain dodge chance equal to your spell critical strike chance each time you deal a critical strike to an enemy, and also both regain 2% of maximum mana.
Dance of the Wicked Rune Location: To unlock the malevolent secrets of the Dance of the Wicked, follow this dark path to find the Rune of Wickedness:
1. Seeking the Reckless Warlock:
- Enter Stranglethorn Vale and venture to the Gurubashi Arena's western side. There, within the shadows, the elusive Reckless Warlock may spawn.
- Alternatively, navigate to Thousand Needles and search near the Singed Highperch Consort, approximately located at coordinates (/way 10, 40).

2. Looting the Brimstone Carving:
- Once you locate the Reckless Warlock, confront and defeat this malevolent entity.
- Loot the Brimstone Carving from the remains of the Reckless Warlock.
3. Unleashing Hellfire's Embrace:
- With the Brimstone Carving in your possession, prepare for a ritualistic transformation.
- Utilize the Hellfire spell to inflict damage upon both enemies and yourself. The dark energies within the Brimstone Carving respond to the chaos wrought by Hellfire.
4. A Sinister Transformation: Continue casting Hellfire until your health descends below 70%. The malevolent energies within the Brimstone Carving respond to the threshold of pain and transformation.5. The Birth of the Rune:
- Witness the Brimstone Carving morph into the coveted Rune of Wickedness as the ritual reaches its climax.
- The Rune of Wickedness is now yours, a symbol of your commitment to the Dance of the Wicked.
 Demonic Knowledge (Boots):
Description: Increases your spell damage and healing by a value equal to 10% of your Demon pet's total Stamina plus Intellect.
Demonic Knowledge Rune Location Guide: To unearth the secrets of Demonic Knowledge, embark on a shadowy quest in Deadwind Pass. Here's a guide to finding the elusive Demonic Knowledge Rune:
1. Venture into Deadwind Pass and seek out the Dalaran Agent at Ariden's Camp. Engage in conversation with them to receive Ariden's Sigil.

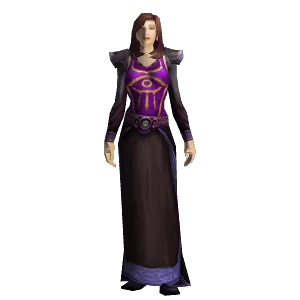
2. Equip Ariden's Sigil and venture forth, or join forces with another player who bears this mystical artifact. With the sigil activated, players must uncover and defeat seven formidable Dark Rider Elites. Activate Ariden's Sigil to Reveal Dark Rider, and the presence of a Dark Rider will be signaled by the acquisition of the Dark Presence buff.
3. Hunt down the Dark Riders in various locations:
- Deadwind Pass: (/way 43 29)

- Duskwood: (/way 23 47)

- Swamp of Sorrows: (/way 69 28).

- Arathi Highlands: (/way 60 40).

- Badlands: (/way 58 54).

- The Barrens: (/way 52 36).

- Desolace: (/way 65 25).

4. Collect the diverse Dalaran Relics dropped by the Dark Riders, including Odd Dalaran Relic, Whirring Dalaran Relic, Heavy Dalaran Relic, Slippery Dalaran Relic, and Creepy Dalaran Relic.
5. Return to the Dalaran Agent with all obtained Dalaran Relics and turn in the respective reward quests:
- ![]() Curious Dalaran Relic
Curious Dalaran Relic
- ![]() Curious Dalaran Relic
Curious Dalaran Relic
- ![]() Curious Dalaran Relic
Curious Dalaran Relic
- ![]() Curious Dalaran Relic
Curious Dalaran Relic
- ![]() Curious Dalaran Relic
Curious Dalaran Relic
- ![]() Curious Dalaran Relic
Curious Dalaran Relic
- ![]() Curious Dalaran Relic
Curious Dalaran Relic
6. Once all seven Dalaran Relics have been surrendered, bask in the glory of your accomplishment as the Demonic Knowledge Rune is bestowed upon you as the ultimate reward. May the arcane forces guide you on this intricate quest, and may your Demonic Knowledge rune with newfound power!
 Shadowflame (Boots):
Description: Targets in a cone in front of the caster take (64 */ 100) Shadow damage and an additional (24 * 4 */ 100) Fire damage over 8 sec. This effect can be consumed with Conflagrate.
Shadowflame Rune Location Guide: To unlock the dark secrets of Shadowflame, embark on a sinister ritual in the desolate lands of Desolace. Follow these steps to find the Rune of Shadowflames:
1. Journey to Shadowflame Ravine:
- Venture to the southeastern corner of Desolace, where the ominous Shadowflame Ravine awaits.
- Begin your path at the coordinates /way 79.7 82.7.

2. Navigating the Ravine: Traverse the ravine following the path laid out. The journey within the desolate landscape leads you to the Altar of Shadowflames.
3. Preparing for the Ritual:
- Equip yourself with buffs and protective measures before engaging with the Altar.
- Utilize spells and items such as Sacrifice, Shadow Ward, Soul Link, Shadow resistance/Fortify from other players, Shadow Resistance gear, and Shadow Protection Potion to bolster your defenses.
4. Channeling the Altar: Shadow Ritual of Sacrifice:
- Cast Shadow Ward to fortify yourself before interacting with the Altar.
- Channel the Altar by standing near it and invoking the Shadow Ritual of Sacrifice. Be prepared, as it inflicts lethal Shadow damage over 5 seconds.
Note: You cannot be healed while channeling the Altar, so ensure your survival through buffs and defensive measures.
5. Cheesing the Sacrifice Portion:
- To mitigate the damage from the Shadow Ritual of Sacrifice, consider using Sacrifice and Shadow Ward while fully geared.
- Swiftly start the channel while naked and promptly equip your gear once the channel is complete.
6. Confronting Seductress Ceeyna:
- Completing the channeling ritual summons Seductress Ceeyna, a level 38 Elite succubus.
- Engage in battle with Seductress Ceeyna. She possesses moderate hit points but can be challenging without assistance.
7. The Spoils of the Ritual:
- Defeat Seductress Ceeyna to claim victory in the ritual.
- Loot the fallen succubus to obtain the coveted Rune of Shadowflames.


 5 MYSTERY GIFTS


